安装apache
1.使用yum安装apache:
yum install -y httpd
2.下载完成后启动:
systemctl start httpd.service
systemctl status httpd.service(查看运行状态)
3.设置apache开机自启动
systemclt enable httpd.service
至此apache安装完毕
安装mod_ssl
yum -y install mod_ssl
安装mariadb
1.首先设置数据源
curl -sS https://downloads.mariadb.com/MariaDB/mariadb_repo_setup | sudo bash
2.更新缓存
yum clean all
yum makecache
yum repolist
3.显示可安装的版本
#这个可以看版本号
yum search mariadb –showduplicates
或
yum search mariadb
4.安装
sudo yum install MariaDB-server galera-4 MariaDB-client MariaDB-shared MariaDB-backup MariaDB-common
5.启动服务
systemctl enable mariadb –now
6.配置数据库
mysql_secure_installation
首先是设置密码,会提示先输入密码
Enter current password for root (enter for none):<–初次运行直接回车
设置密码
Set root password? [Y/n] <– 是否设置root用户密码,输入y并回车或直接回车
New password: <– 设置root用户的密码
Re-enter new password: <– 再输入一次你设置的密码
其他配置
Remove anonymous users? [Y/n] <– 是否删除匿名用户,回车
Disallow root login remotely? [Y/n] <–是否禁止root远程登录,回车,
Remove test database and access to it? [Y/n] <– 是否删除test数据库,回车
Reload privilege tables now? [Y/n] <– 是否重新加载权限表,回车
初始化MariaDB完成,接下来测试登录
mysql -uroot -ppassword
设置数据库允许远程连接:
mysql -uroot -p(进入数据库)
查看MySQL库中的user表(user表中存着链接信息)
select host,user from user;
使用更新语句是root用户可以在任意IP的电脑上登录
update user set host=’%’,user=’root’ limit 1;
使修改生效
flush privileges;
退出Mariadb后并重启 mariadb服务
systemctl restart mariadb
至此,数据库安装完毕
安装php
1.首先安装 EPEL 源:
yum install epel-release
2.安装 REMI 源:
yum install http://rpms.remirepo.net/enterprise/remi-release-7.rpm
3.安装 Yum 源管理工具:
yum install yum-utils
4.安装 PHP7.3:
yum install -y php73-php-fpm php73-php-cli php73-php-bcmath php73-php-gd php73-php-json php73-php-mbstring php73-php-mcrypt php73-php-mysqlnd php73-php-opcache php73-php-pdo php73-php-pecl-crypto php73-php-pecl-mcrypt php73-php-pecl-geoip php73-php-recode php73-php-snmp php73-php-soap php73-php-xmll
5.启动php:
systemctl enable php73-php-fpm(开机自启动)
systemctl start php73-php-fpm(启动)
配置apache虚拟机
在/etc/httpd/conf.d文件夹新建一个conf配置文件,再把以下内容拷贝到里面
例如:
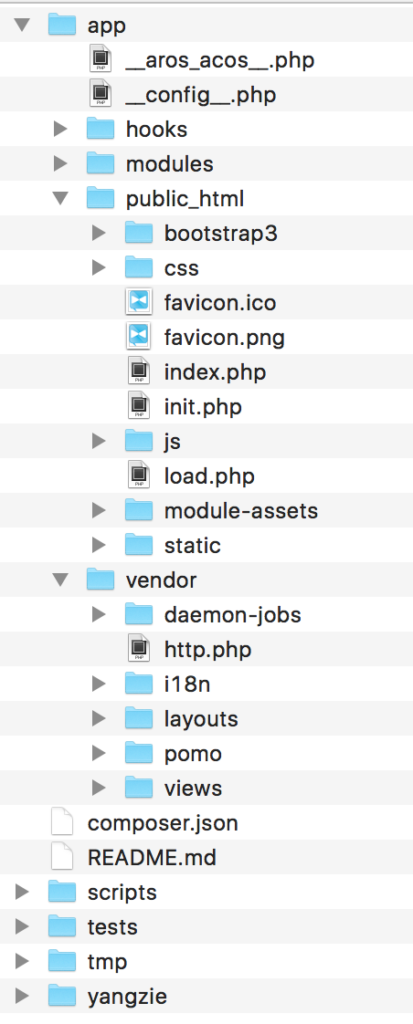
DocumentRoot “/var/www/html/web/app/public_html” #项目根目录
ServerName lottery.yidianhulian.com #绑定的域名
Options FollowSymLinks ExecCGI
AllowOverride All
Order allow,deny
Allow from all
Require all granted
DirectoryIndex index.php index.html error/index.html
ErrorDocument 400 /error/400.html
ErrorDocument 403 /error/403.html
ErrorDocument 404 /error/404.html
ErrorDocument 500 /error/500.html
ErrorDocument 501 /error/501.html
ErrorDocument 502 /error/502.html
ErrorDocument 503 /error/503.html
ErrorDocument 504 /error/504.html
ErrorDocument 505 /error/505.html
ErrorDocument 506 /error/506.html
ErrorDocument 507 /error/507.html
ErrorDocument 510 /error/510.html
配置https
1.使用域名可以申请免费的ssl证书,选择apache版本,证书一共有三个文件,例如:
2.在服务器中新建一个文件夹,把这三个文件拷贝到里面
3.配置https其实就是配置/etc/httpd/conf.d/ssl.conf文件,使用yum下载mod_ssl后会自动生成这个文件。对文件进行配置,例如:
#
# When we also provide SSL we have to listen to the
# the HTTPS port in addition.
#
Listen 443 https
##
## SSL Global Context
##
## All SSL configuration in this context applies both to
## the main server and all SSL-enabled virtual hosts.
##
# Pass Phrase Dialog:
# Configure the pass phrase gathering process.
# The filtering dialog program (`builtin’ is a internal
# terminal dialog) has to provide the pass phrase on stdout.
SSLPassPhraseDialog exec:/usr/libexec/httpd-ssl-pass-dialog
# Inter-Process Session Cache:
# Configure the SSL Session Cache: First the mechanism
# to use and second the expiring timeout (in seconds).
SSLSessionCache shmcb:/run/httpd/sslcache(512000)
SSLSessionCacheTimeout 300
# Pseudo Random Number Generator (PRNG):
# Configure one or more sources to seed the PRNG of the
# SSL library. The seed data should be of good random quality.
# WARNING! On some platforms /dev/random blocks if not enough entropy
# is available. This means you then cannot use the /dev/random device
# because it would lead to very long connection times (as long as
# it requires to make more entropy available). But usually those
# platforms additionally provide a /dev/urandom device which doesn’t
# block. So, if available, use this one instead. Read the mod_ssl User
# Manual for more details.
SSLRandomSeed startup file:/dev/urandom 256
SSLRandomSeed connect builtin
#SSLRandomSeed startup file:/dev/random 512
#SSLRandomSeed connect file:/dev/random 512
#SSLRandomSeed connect file:/dev/urandom 512
#
# Use “SSLCryptoDevice” to enable any supported hardware
# accelerators. Use “openssl engine -v” to list supported
# engine names. NOTE: If you enable an accelerator and the
# server does not start, consult the error logs and ensure
# your accelerator is functioning properly.
#
SSLCryptoDevice builtin
#SSLCryptoDevice ubsec
##
## SSL Virtual Host Context
##
#找到这个标签
# General setup for the virtual host, inherited from global configuration
ServerName lottery.yidianhulian.com #配置域名
DocumentRoot /var/www/html/web/app/public_html #配置项目根目录
#添加这个标签允许访问该项目
Options FollowSymLinks ExecCGI
AllowOverride All
Order allow,deny
Allow from all
Require all granted
DirectoryIndex index.php index.html error/index.html
# Use separate log files for the SSL virtual host; note that LogLevel
# is not inherited from httpd.conf.
ErrorLog logs/ssl_error_log
TransferLog logs/ssl_access_log
LogLevel warn
# SSL Engine Switch:
# Enable/Disable SSL for this virtual host.
SSLEngine on
# SSL Protocol support:
# List the enable protocol levels with which clients will be able to
# connect. Disable SSLv2 access by default:
SSLProtocol all -SSLv2 -SSLv3 # 添加SSL协议支持协议,去掉不安全的协议。
# SSL Cipher Suite:
# List the ciphers that the client is permitted to negotiate.
# See the mod_ssl documentation for a complete list.
SSLCipherSuite HIGH:!RC4:!MD5:!aNULL:!eNULL:!NULL:!DH:!EDH:!EXP:+MEDIUM # 修改加密套件。
# Speed-optimized SSL Cipher configuration:
# If speed is your main concern (on busy HTTPS servers e.g.),
# you might want to force clients to specific, performance
# optimized ciphers. In this case, prepend those ciphers
# to the SSLCipherSuite list, and enable SSLHonorCipherOrder.
# Caveat: by giving precedence to RC4-SHA and AES128-SHA
# (as in the example below), most connections will no longer
# have perfect forward secrecy – if the server’s key is
# compromised, captures of past or future traffic must be
# considered compromised, too.
#SSLCipherSuite RC4-SHA:AES128-SHA:HIGH:MEDIUM:!aNULL:!MD5
SSLHonorCipherOrder on
# Server Certificate:
# Point SSLCertificateFile at a PEM encoded certificate. If
# the certificate is encrypted, then you will be prompted for a
# pass phrase. Note that a kill -HUP will prompt again. A new
# certificate can be generated using the genkey(1) command.
#SSLCertificateFile /etc/pki/tls/certs/localhost.crt
SSLCertificateFile /etc/httpd/cert/4520877_lottery.yidianhulian.com_public.crt #证书所在目录。要一一对应,注意看文件名
# Server Private Key:
# If the key is not combined with the certificate, use this
# directive to point at the key file. Keep in mind that if
# you’ve both a RSA and a DSA private key you can configure
# both in parallel (to also allow the use of DSA ciphers, etc.)
SSLCertificateKeyFile /etc/httpd/cert/4520877_lottery.yidianhulian.com.key #证书所在目录。要一一对应,注意看文件名
# Server Certificate Chain:
# Point SSLCertificateChainFile at a file containing the
# concatenation of PEM encoded CA certificates which form the
# certificate chain for the server certificate. Alternatively
# the referenced file can be the same as SSLCertificateFile
# when the CA certificates are directly appended to the server
# certificate for convinience.
SSLCertificateChainFile /etc/httpd/cert/4520877_lottery.yidianhulian.com_chain.crt #证书所在目录。要一一对应,注意看文件名
# Certificate Authority (CA):
# Set the CA certificate verification path where to find CA
# certificates for client authentication or alternatively one
# huge file containing all of them (file must be PEM encoded)
#SSLCACertificateFile /etc/pki/tls/certs/ca-bundle.crt
# Client Authentication (Type):
# Client certificate verification type and depth. Types are
# none, optional, require and optional_no_ca. Depth is a
# number which specifies how deeply to verify the certificate
# issuer chain before deciding the certificate is not valid.
#SSLVerifyClient require
#SSLVerifyDepth 10
# Access Control:
# With SSLRequire you can do per-directory access control based
# on arbitrary complex boolean expressions containing server
# variable checks and other lookup directives. The syntax is a
# mixture between C and Perl. See the mod_ssl documentation
# for more details.
#
#SSLRequire ( %{SSL_CIPHER} !~ m/^(EXP|NULL)/ \
# and %{SSL_CLIENT_S_DN_O} eq “Snake Oil, Ltd.” \
# and %{SSL_CLIENT_S_DN_OU} in {“Staff”, “CA”, “Dev”} \
# and %{TIME_WDAY} >= 1 and %{TIME_WDAY} <= 5 \
# and %{TIME_HOUR} >= 8 and %{TIME_HOUR} <= 20 ) \
# or %{REMOTE_ADDR} =~ m/^192\.76\.162\.[0-9]+$/
#
# SSL Engine Options:
# Set various options for the SSL engine.
# o FakeBasicAuth:
# Translate the client X.509 into a Basic Authorisation. This means that
# the standard Auth/DBMAuth methods can be used for access control. The
# user name is the `one line’ version of the client’s X.509 certificate.
# Note that no password is obtained from the user. Every entry in the user
# file needs this password: `xxj31ZMTZzkVA’.
# o ExportCertData:
# This exports two additional environment variables: SSL_CLIENT_CERT and
# SSL_SERVER_CERT. These contain the PEM-encoded certificates of the
# server (always existing) and the client (only existing when client
# authentication is used). This can be used to import the certificates
# into CGI scripts.
# o StdEnvVars:
# This exports the standard SSL/TLS related `SSL_*’ environment variables.
# Per default this exportation is switched off for performance reasons,
# because the extraction step is an expensive operation and is usually
# useless for serving static content. So one usually enables the
# exportation for CGI and SSI requests only.
# o StrictRequire:
# This denies access when “SSLRequireSSL” or “SSLRequire” applied even
# under a “Satisfy any” situation, i.e. when it applies access is denied
# and no other module can change it.
# o OptRenegotiate:
# This enables optimized SSL connection renegotiation handling when SSL
# directives are used in per-directory context.
#SSLOptions +FakeBasicAuth +ExportCertData +StrictRequire
SSLOptions +StdEnvVars
SSLOptions +StdEnvVars
# SSL Protocol Adjustments:
# The safe and default but still SSL/TLS standard compliant shutdown
# approach is that mod_ssl sends the close notify alert but doesn’t wait for
# the close notify alert from client. When you need a different shutdown
# approach you can use one of the following variables:
# o ssl-unclean-shutdown:
# This forces an unclean shutdown when the connection is closed, i.e. no
# SSL close notify alert is send or allowed to received. This violates
# the SSL/TLS standard but is needed for some brain-dead browsers. Use
# this when you receive I/O errors because of the standard approach where
# mod_ssl sends the close notify alert.
# o ssl-accurate-shutdown:
# This forces an accurate shutdown when the connection is closed, i.e. a
# SSL close notify alert is send and mod_ssl waits for the close notify
# alert of the client. This is 100% SSL/TLS standard compliant, but in
# practice often causes hanging connections with brain-dead browsers. Use
# this only for browsers where you know that their SSL implementation
# works correctly.
# Notice: Most problems of broken clients are also related to the HTTP
# keep-alive facility, so you usually additionally want to disable
# keep-alive for those clients, too. Use variable “nokeepalive” for this.
# Similarly, one has to force some clients to use HTTP/1.0 to workaround
# their broken HTTP/1.1 implementation. Use variables “downgrade-1.0” and
# “force-response-1.0” for this.
BrowserMatch “MSIE [2-5]” \
nokeepalive ssl-unclean-shutdown \
downgrade-1.0 force-response-1.0
# Per-Server Logging:
# The home of a custom SSL log file. Use this when you want a
# compact non-error SSL logfile on a virtual host basis.
CustomLog logs/ssl_request_log \
“%t %h %{SSL_PROTOCOL}x %{SSL_CIPHER}x \”%r\” %b”